How to Set Up Your “CRA My Business Account”
The “CRA My Business Account” is the official CRA online portal for business owners. It allows business owners to interact with the CRA electronically and access their business information relating to corporate income tax, GST/HST, payroll and more.
This article will provide important information about the CRA My Business Account, including:
- Who can use CRA My Business Account
- How to set up and access your CRA My Business Account
- How to authorize a representative within your CRA My Business Account
Let’s get started!
Who Can Use the CRA My Business Account
Business owners (including partners, directors, and officers) can use the “CRA My Business Account.”
That’s it. Those are the people who can use it.
This means that as a business owner, you can’t set up employees or other third parties with access to your “CRA My Business Account”.
However, there is a way to provide third parties like your accountant with access to your information. Accountants like ĐßĐßÍřŐľ will access your CRA information using their “CRA Represent a Client” account.
The last section of this article will explain how you can help your accountant gain access to your CRA information. It’s pretty much essential that they have this access.
How to set up your CRA My Business Account
There are a few steps required when setting up your CRA My Business Account. We’ll start with a helpful video that CRA has prepared and then provide step-by-step instructions below.
Timing of CRA My Business Account setup
There is a step that involves calling the CRA to speak to an agent and obtain an access code. To speed up the process, begin your registration during CRA’s operating hours listed below.
- Monday to Friday 8am to 8pm local time
- Saturday 9am to 5pm local time
- Closed on Sunday
What you will need
To set up your CRAÂ My Business Account, you will need:
- Access to a computer and internet connection
- Your social insurance number
- Your 9 digit business number (starts with a 7 or an 8)
- Your current postal code
- A copy of your most recent personal tax return
- Your email address
- To be able to call CRA and speak to an agent
Start Here - CRAÂ My Business Account Setup
To get started - Go to the
There are two options you can use to register.
- Login using a sign-in partner (an existing login for a financial institution)
- Create a new CRA user ID and login using that
Option 1 - Login Using a Sign-in Partner
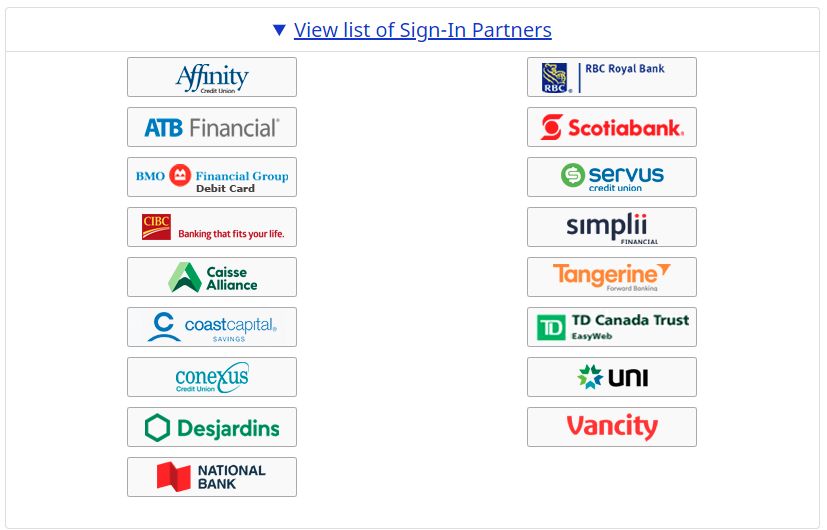
CRA has partnered with a number of financial institutions to allow you to sign in using your online banking login credentials.
This is a fast way to get started if you already have online access to one of the financial institutions listed below.
Step 1 - Sign in using an existing financial institution login
If applicable, login using one of your existing online banking logins listed below. If you don’t have one of these, please use option 2 (below) to create your account.
Step 2 - Enter your social insurance number
Enter your social insurance number as shown below.

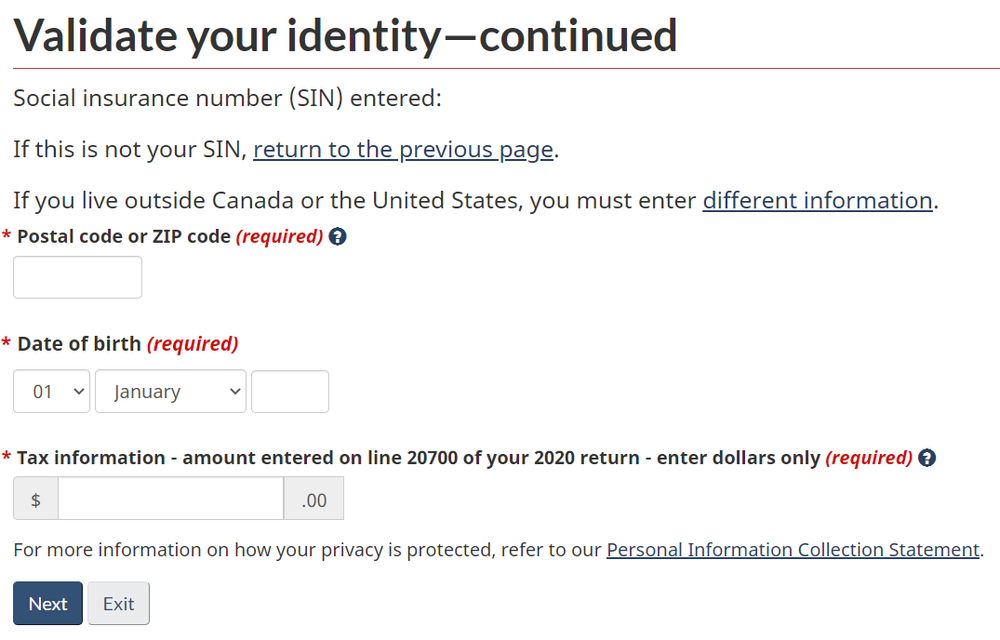
Step 3 - Validate your identity
‍ Validate your identity by entering the requested info (this is where you’ll need your previous year’s tax return).
‍
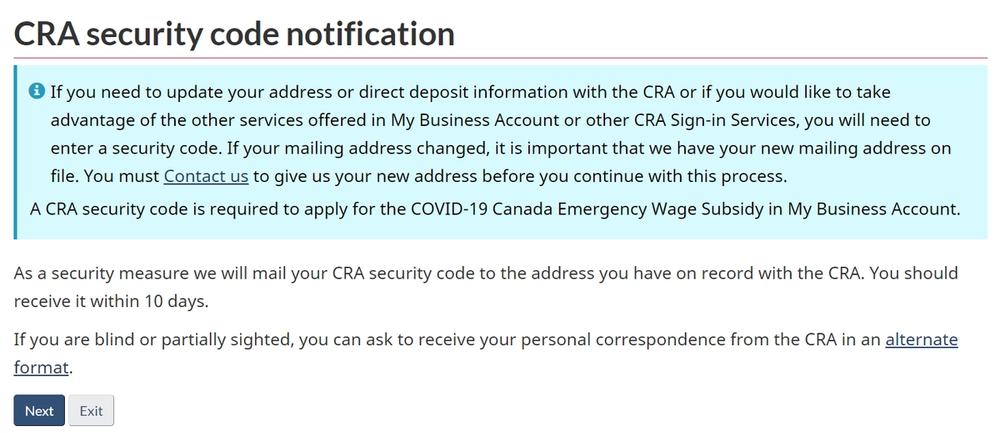
Step 4 - CRA sends you a security code
CRA can either snail-mail you a security code or email you a security code. If you choose email, you will need to call CRA at 1-800-959-8281 to confirm this step. Email is the faster of the two options as snail-mail can take up to 10 days.
Step 5 - Enter your security code once received
Once you have your security code, login to your new account and choose the “Enter or request your security code” option to finalize setting up your CRA account.

Step 6 - Enter your business number
‍Once you’ve logged in, you can provide your business number to connect your new login with that business.
Option 2 - Create a CRA User ID
If you don’t have online access to one of the financial institutions noted above, then you’ll need to create a CRA User ID. Don’t worry, it’s only a little bit painful. Here’s how:
Step 1 - Select "CRA Register" under option 2
On the My Business Account page, click the “CRA register” link under “Option

Step 2 - Enter your social insurance number
Enter your social insurance number as shown below.

Step 3 - Validate your identity
Validate your identity by entering the requested info (this is where you’ll need your previous year’s tax return).

Step 4 - CRA sends you a security code
CRA can either snail-mail you a security code or email you a security code. If you choose email, you will need to call CRA at 1-800-959-8281 to confirm this step. Email is the faster of the two options as snail-mail can take up to 10 days.

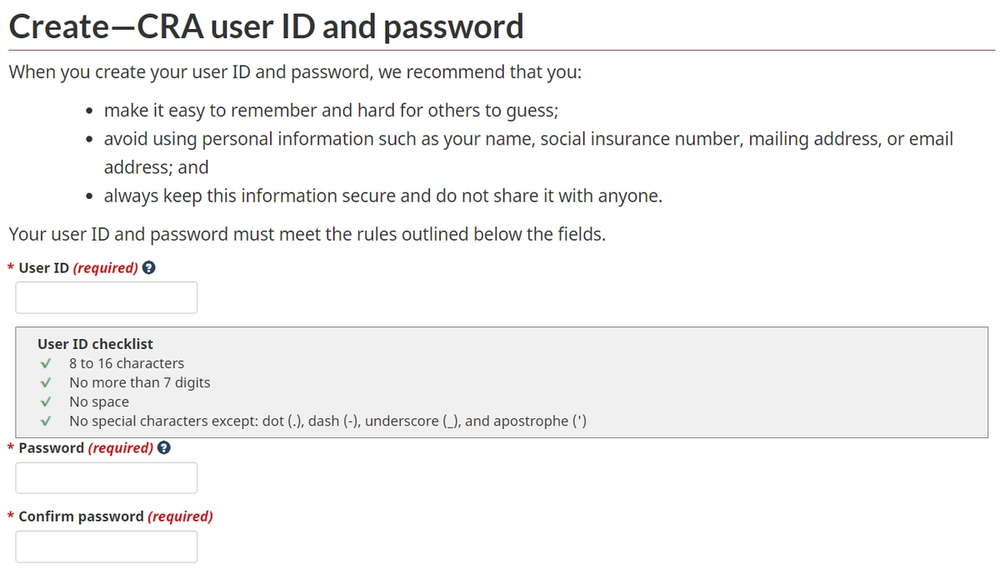
Step 5 - Create a CRA user ID and password
Next you will create a CRA user ID and password.
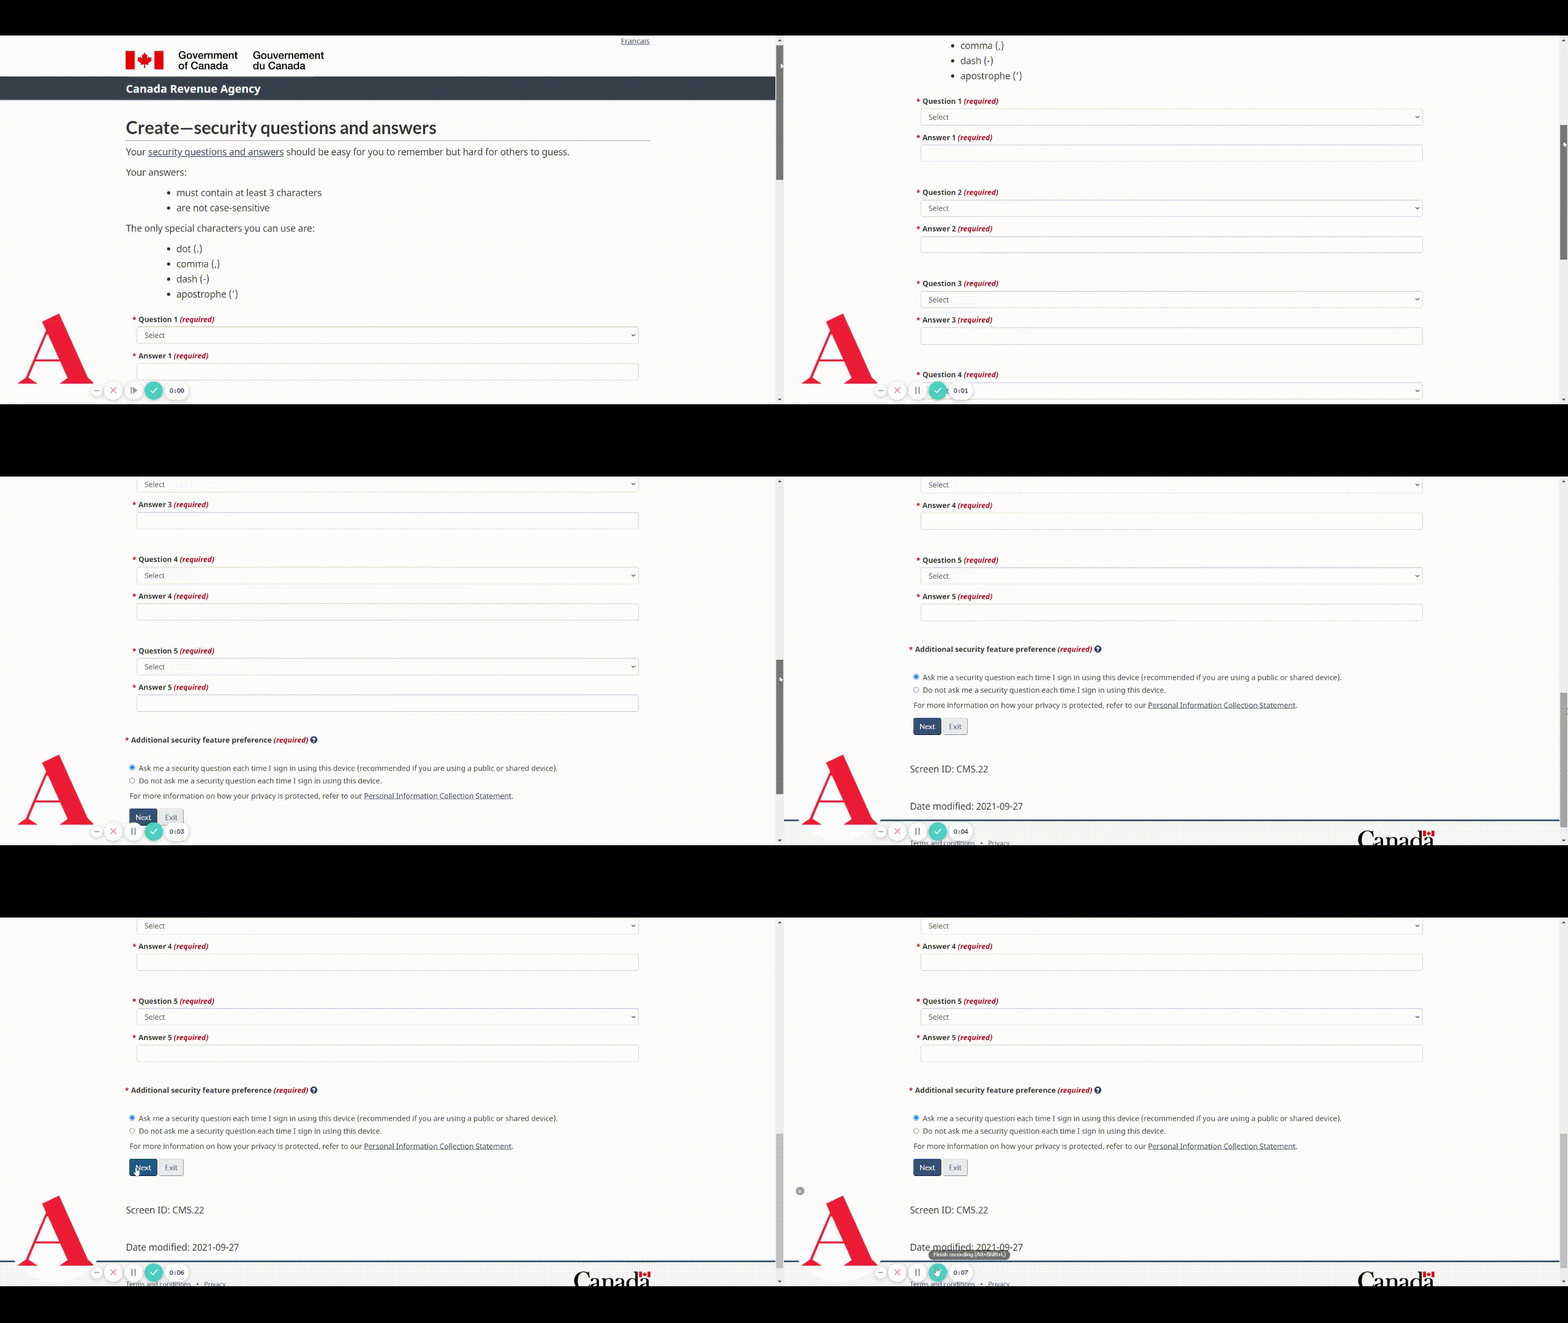
Step 6 - Create some security questions
‍CRA will ask you to choose from a number of security questions to help authenticate your sign-ins.
Step 7 - Enter your security code once received
Once you have your security code, login to your new account and choose the “Enter or request your security code” option to finalize setting up your CRA account.

Step 8 - Enter your business number ‍
Once you’ve logged in, you can provide your business number to connect your new login with that business.
Now that you’ve created your CRA login and connected it with your business number, you can access the business’ tax information.
You will also be able to provide access to your accountant through their “Represent a client” account.
Authorize a Representative using your CRA My Business account
It’s important to provide your accountant with access to your business’ tax information through CRA’s online portal. Accountant’s like ĐßĐßÍřŐľ Accounting use CRA’s “Represent a client” portal to request third party access to this information.
Now that you have a “CRA My Business” account, your accountant can request access through their “Represent a client” portal. Here is how that process works.
Option 1 - Your Accountant Requests Access
There are two methods for authorizing a representative using your CRA My Business account. At ĐßĐßÍřŐľ, we will typically initiate (option 1 here), but you can also do it yourself (see option 2 below).
Your accountant will send you a form to sign which will authorize them to request access to your account through their online portal. Sign this document and your accountant will submit it to the CRA.
Once your accountant has submitted the request for authorization, you can login to your CRA My Business account and approve the request.
Step 1 - Login to your CRA My Business account
Login to your CRA My Business account. If you don’t have one yet, please see the section above on how to create a CRA My Business account.
Step 2 - Navigate to the “Profile” section of your account
Navigate to the “Profile” section on the top banner of your CRA My Business account.

‍
‍
Step 3 - Choose “Manage authorized representatives
From the profile under “Authorized representatives,” choose “Manage authorized representatives.”

Step 4 - Choose “Confirm pending authorizations
Your accountant has already submitted the authorization request so you will be choosing “Confirm pending authorizations.”

Step 5 - Confirm the authorization request from your accountant
Once in the “Confirm pending authorizations page,” you will be able to confirm the authorization request that your accountant has previously submitted.
It may take a couple of days for the request to show up, so check back in 2 days if you don’t see it there yet.
You’re done!
Once confirmed, your accountant will have access to your business’ information with CRA.
Option 2 - Initiate the authorization request yourself
There is an alternative method that you can use if you want to initiate the authorization request for your accountant.
Step 1 - Login to your CRA My Business account
Login to your CRA My Business account. If you don’t have one yet, please see the section above on how to create a CRA My Business account.
Step 2 - Navigate to the “Profile” section of your account
Just like in option 1, you will navigate to the “Profile” section on the top banner of your CRA My Business account.

Step 3 - Choose “Manage authorized representatives"
From the profile under “Authorized representatives,” choose “Manage authorized representatives.”

Step 4 - Choose “Authorize a representative” within your profile
Navigate to your CRA My Business account profile as shown above.
Instead of choosing “Confirm pending authorizations,” you will choose “Authorize a representative” to initiate the authorization yourself.

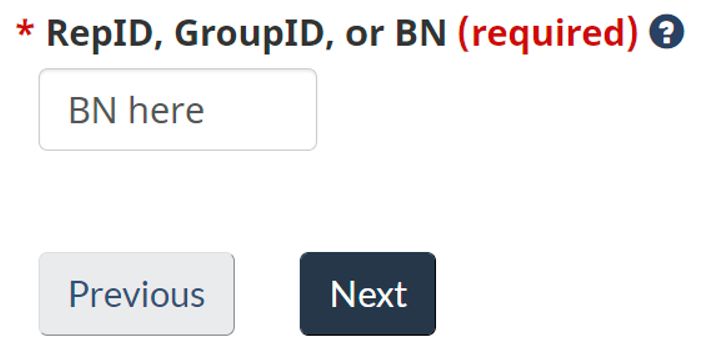
Step 5 - Enter your accountant’s representative ID number
Enter your accountant’s representative ID number and click next. They will be able to provide you with their RepID, GroupID or BN. Any one of those three options should work.
Step 6 - Choose level of authorization and expiry date
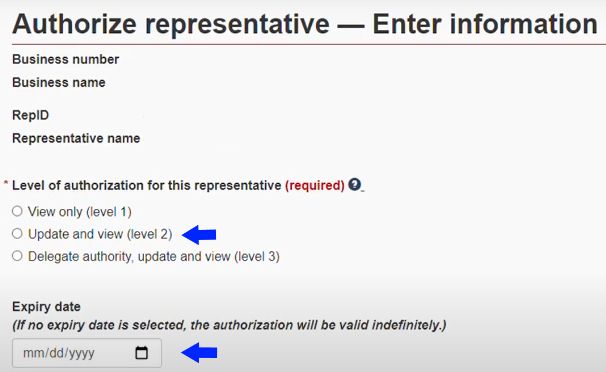
In the next step you will choose the level of authorization that you want your accountant to have. You can also add an expiry date if you like.
At ĐßĐßÍřŐľ, our typical setup is to choose level 2 authorization (update and view) and leave the expiry date blank. Authorization can be cancelled manually at any time.
Step 7 - Choose which accounts to authorize
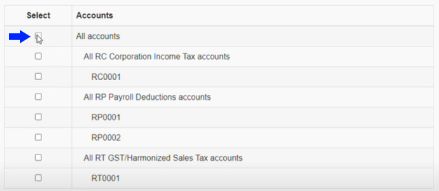
The last step before finalizing authorization is to choose which program accounts you want your accountant to be able to update and view. You can authorize access for just one account or all.
At ĐßĐßÍřŐľ our standard setup is to authorize all accounts so we can dive into the information and help out as needed.
Click next and then the last step is to confirm the information you’ve entered.
You’re done!
Once confirmed, your accountant will have access to your business’ information with CRA.
‍


